Kubernetes Dashboard: Web-based UI to manage Kubernetes Cluster
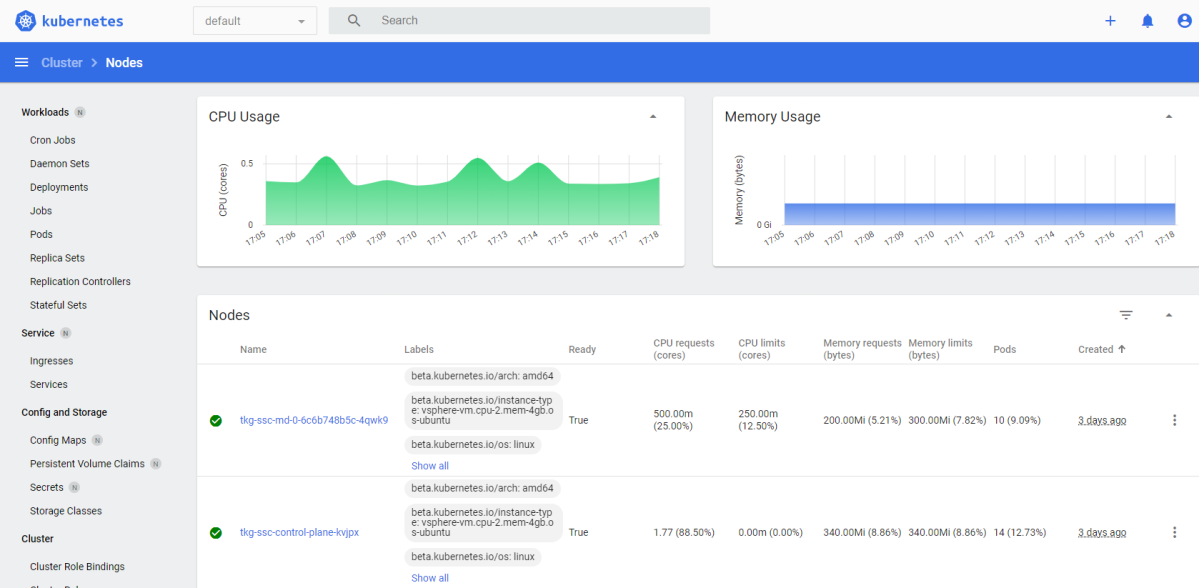
Kubernetes Dashboard is a web-based user interface that makes it easy to manage your Kubernetes clusters.

Kubernetes Dashboard is a web-based user interface that makes it easy to manage your Kubernetes clusters. It's like having a control panel for all your containerized applications, where you can deploy, scale, and monitor everything in a user-friendly environment.
Being web-based means that you can access the Kubernetes Dashboard from any device with an internet connection and a web browser. It's designed to be intuitive and easy to navigate, so you can quickly find what you're looking for and take action without a hassle.
Monitoring and Troubleshooting
The Kubernetes Dashboard not only makes it simple to manage your clusters but also offers monitoring and troubleshooting tools. With built-in graphs and logs, you can keep an eye on the health of your applications and quickly identify and resolve any issues that arise.
Installing Kubernetes Dashboard
To start using the Kubernetes Dashboard, you'll first need to install and configure it. This process involves deploying the Dashboard as a container in your Kubernetes cluster and setting up secure access to the interface. We'll walk you through these steps, making it a breeze to get up and running.
Download Deployment Manifest
The official deployment manifest is readily available for download, enabling us to swiftly set it up on our Kubernetes Cluster.
~$ wget https://raw.githubusercontent.com/kubernetes/dashboard/v2.7.0/aio/deploy/recommended.yaml -o deployment.yamlInstall Kubernetes Dashboard
~$ kubectl apply -f deployment.yamlVerify Installation
~$ kubectl -n kubernetes-dashboard get pods

NAME                            READY   STATUS
kubernetes-dashboard-xxx        1/1     Running
The Kubernetes Dashboard has been successfully deployed; however, we cannot access it until we create two additional resources: an Ingress and a Service Account.
Create Ingress
Before we proceed, we must enable the Ingress to generate an SSL Certificate using Let's Encrypt via Cert Manager. To learn how to do this, refer to the guide provided below.

And then we can create Ingress resources
Install Ingress to Kubernetes Cluster
~$ kubectl -n kubernetes-dashboard apply -f ingress.yamlOpen your browser and navigate to https://kubernetes-dashboard.example.com, you will see login page of Kubernetes Dashboard

At this point, we need to create a Service Account, obtain the token associated with it, and utilize this token for logging in to the Kubernetes Dashboard.
Create Service Account
The next step involves creating a Service Account and the associated secret. In the latest Kubernetes versions, a secret is not automatically created when you create a Service Account. Therefore, we need to explicitly create a secret resource.
Install it
~$ kubectl -n kubernetes-dashboard apply -f admin-role.yamlGet token for login
~$ kubectl -n kubernetes-dashboard get secret admin-user-secret -o jsonpath="{.data.token}" | base64 -dSimply copy the token and use it for logging in. Voilà! Now you have a sleek and user-friendly web-based application for managing your Kubernetes Cluster!
About 8grams
We are a small DevOps Consulting Firm that has a mission to empower businesses with modern DevOps practices and technologies, enabling them to achieve digital transformation, improve efficiency, and drive growth.
Ready to transform your IT Operations and Software Development processes? Let's join forces and create innovative solutions that drive your business forward.
Subscribe to our newsletter for cutting-edge DevOps practices, tips, and insights delivered straight to your inbox!
